Why Test Your Home’s Air Quality?
The air inside a home can be significantly more polluted than the air outside.
Everyday activities, such as cooking, cleaning, and even the materials used to build your home, can release contaminants.
Home air testing identifies these specific pollutants, allowing you to take targeted action.
Identifying these risks is the first step toward preventing health issues directly linked to poor indoor air, such as allergies, asthma, respiratory infections, and chronic conditions. This is especially important for protecting children, the elderly, and individuals with pre-existing health conditions.
Key Indoor Air Pollutants to Identify
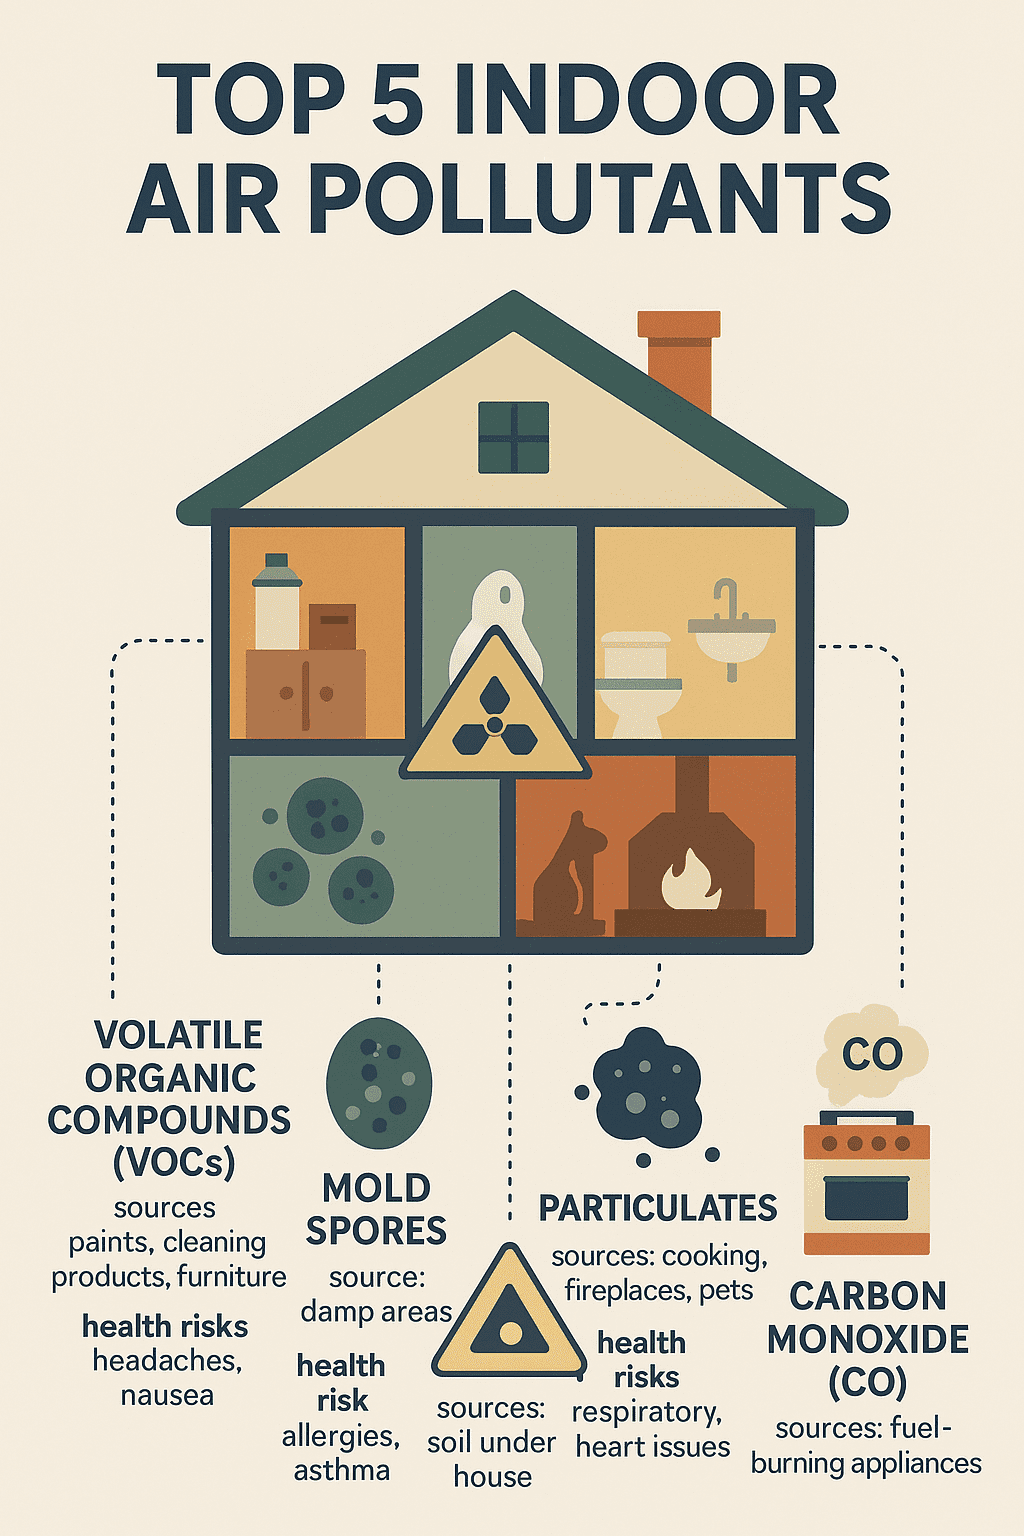
Effective air quality management starts with knowing what to look for.
Your home’s air can contain several types of harmful substances.
- Volatile Organic Compounds (VOCs): These are chemicals released from paints, cleaning supplies, furniture, and building materials. Examples include formaldehyde and benzene. High VOC levels can cause headaches, nausea, and damage to the liver, kidneys, and central nervous system.
- Mold Spores: Mold grows in damp areas with poor ventilation, like basements, bathrooms, or areas with leaks. Inhaling mold spores can trigger allergic reactions and asthma attacks. Certain molds produce mycotoxins, which can lead to more severe health effects.
- Radon: This is a radioactive, odorless, and colorless gas that comes from the natural decay of uranium in soil and rock. It enters homes through cracks in the foundation. Radon is the second leading cause of lung cancer in the United States.
- Particulate Matter (PM2.5 and PM10): These are microscopic dust, soot, and dander particles that can be inhaled deep into the lungs, causing respiratory and cardiovascular problems. Sources include cooking, fireplaces, and pets.
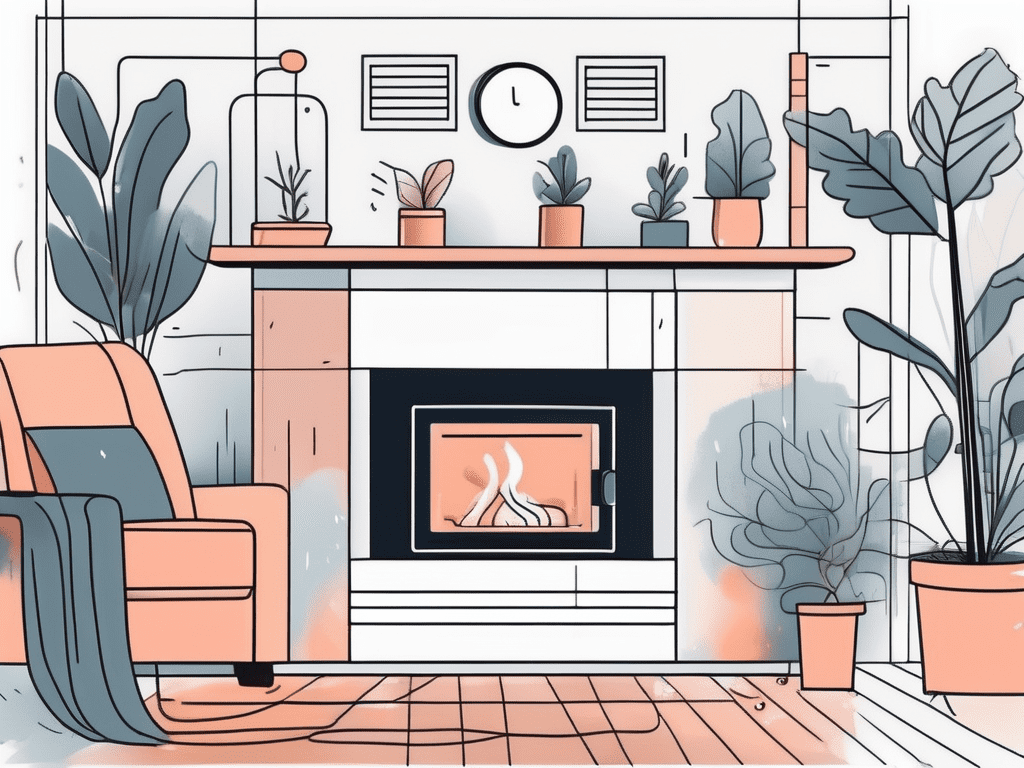
- Carbon Monoxide (CO): A colorless, odorless gas produced by fuel-burning appliances like furnaces, water heaters, and stoves. CO is highly toxic and can be fatal at high concentrations.
When to Perform an Air Quality Test
Regular testing helps establish a baseline and identify new problems. Consider testing your home’s air under these specific circumstances:
- After moving into a new home.
- Following major renovations or the purchase of new furniture.
- If you or your family experience unexplained allergies, headaches, or respiratory symptoms.
- When you notice persistent musty odors or see visible mold growth.
- As part of routine home maintenance, especially for radon, which should be tested every two years.
- During different seasons, as changes in humidity and ventilation can alter pollutant levels.
DIY Home Air Testing vs. Professional Services
You have two main options for testing your air: do-it-yourself kits or hiring a professional.
DIY Home Air Testing Kits are a good first step for identifying common issues.
- Pros: Affordable, accessible, good for initial screening.
- Cons: Can be less accurate, may not test for all pollutants, requires careful following of instructions to avoid sample contamination.
Professional Indoor Air Quality Testing provides a more comprehensive and accurate analysis.
- Pros: Uses advanced, calibrated equipment for precise results. Technicians can identify pollutant sources and provide a detailed remediation plan.
- Cons: More expensive, requires scheduling an appointment.
Consider a professional test if:
- DIY results show high pollutant levels.
- Symptoms of poor air quality persist after you’ve taken action.
- You need comprehensive documentation for a real estate transaction.
- You suspect a complex issue that DIY kits cannot detect.
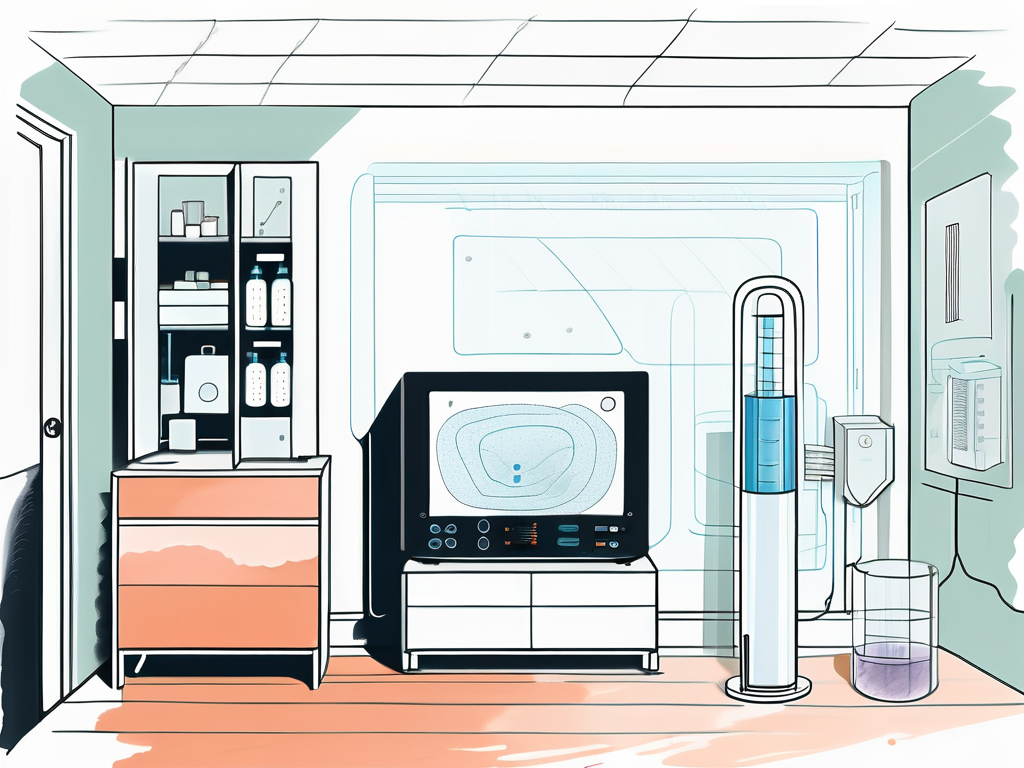
Types of DIY Home Air Testing Kits
Different kits are designed to detect specific pollutants. Using the right kit is important for getting useful results.
| Test Type | Detects | How It Works | Best For |
|---|---|---|---|
| Chemical (VOC) Kits | Volatile Organic Compounds like formaldehyde. | An active or passive sampling device collects air over a period. You mail the device to a lab for analysis. | Identifying harmful chemicals from new furniture, paint, or cleaning products. |
| Mold Kits | Presence and type of mold spores. | Petri dishes (settle plates) or swabs collect samples from surfaces or air. Sent to a lab for identification. | Confirming the presence of mold when you see or smell it, or in high-humidity areas. |
| Radon Kits | Presence of radon gas. | A charcoal canister or alpha track detector is left in the lowest lived-in level of your home for a set time, then mailed to a lab. | Routine safety screening, especially in basements or ground-floor rooms. |
| Air Quality Monitors | Real-time data for various pollutants. | Electronic devices that continuously measure pollutants like Particulate Matter (PM2.5), VOCs, temperature, and humidity. | Ongoing monitoring of air quality to track changes from daily activities like cooking or opening windows. |
Shop DIY Home Air Testing Kits
How to Use a Home Air Testing Kit
Accurate results depend on correct sample collection. Always read the kit’s instructions first.
- Prepare the Area: Close windows and doors for at least 24 hours before the test to get a representative sample of your indoor air.
- Select a Location: Place the sampling device in a frequently used room, like a living room or bedroom. Position it at breathing height (3-5 feet off the floor) and away from vents, windows, or direct sources of contamination like a kitchen.
- Collect the Sample: Follow the specific instructions. This may involve uncapping a canister, opening a slide, or running a small air pump.
- Document: Record the start and end times, date, and exact location of the sample.
- Package and Ship: Securely seal the sample as directed. Mail it to the designated laboratory immediately using the provided packaging.
- Review Results: The lab will send a report detailing the findings.
Understanding Your Test Results
Your results will show concentration levels of specific pollutants.
Compare these numbers to established guidelines from organizations like the Environmental Protection Agency (EPA) or the World Health Organization (WHO).
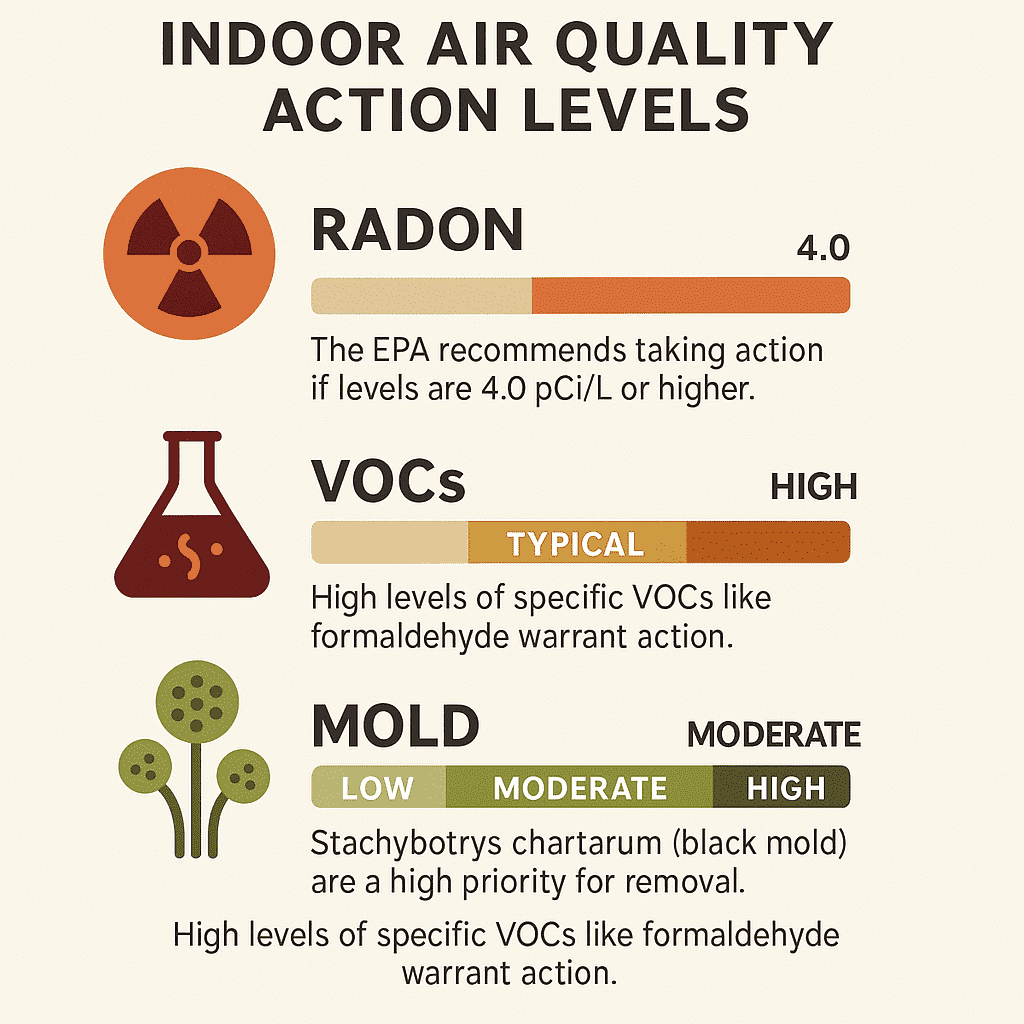
- Radon: The EPA recommends taking action if levels are 4.0 picocuries per liter (pCi/L) or higher.
- VOCs: There is no single standard, but reports often compare your levels to typical ranges found in homes. High levels of specific VOCs like formaldehyde warrant action.
- Mold: Results will identify the types of mold present and their spore counts. Certain types, like Stachybotrys chartarum (black mold), are a high priority for removal.
If results indicate high pollutant levels, the report may suggest next steps.
This could include increasing ventilation, using air purifiers, removing the pollutant source, or hiring a professional remediation service.
How to Improve Indoor Air Quality
Cost of Home Air Testing
Costs vary based on the method and comprehensiveness of the test.
- DIY Testing Kits:
- Radon Kits: $15 – $40
- Mold Kits: $20 – $50 (lab fees may be extra)
- VOC Kits: $70 – $150+ (includes lab analysis)
- Electronic Air Quality Monitors: $100 – $300+ for consumer-grade models that provide real-time data.
- Professional Air Testing Services: $200 – $1,000+. The price depends on the size of your home and the range of pollutants being tested. A comprehensive test for mold, VOCs, radon, and particulates will be at the higher end of this range.
Get a Quote for Professional Air Testing
Frequently Asked Questions (FAQ)
Test for radon every two years. Test for other pollutants after a move, renovation, or if you notice new health symptoms or odors. Monitoring with an electronic device can provide continuous insight.
They are effective for screening and identifying the presence of specific major pollutants like radon and mold. For precise concentration measurements and a wider range of pollutants, professional testing is more accurate.
This depends on your home, but radon is critical for all homes because it is a widespread and serious health risk. If you have dampness or musty smells, mold is a priority. If you have new paint or furniture, test for VOCs.
An air purifier can help, but it doesn’t solve the root problem. Testing tells you what is wrong so you can fix the source. For example, if you have a high radon level, you need a mitigation system, not just an air purifier.
The appropriate action depends on the pollutant. It may involve increasing ventilation, removing the source (e.g., a water leak causing mold), purchasing a targeted air purifier, or hiring a professional remediation service for issues like radon or extensive mold.